
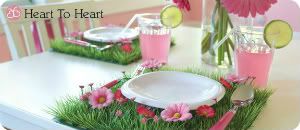
Over the next two weeks I will be showcasing the latest party I planned...An ICE CREAM SOCIAL! This party was so much fun to style and put together. I'm dreaming of ice cream all night long now! I'm starting off with the party activities {since I was invited to talk about neighborhood block party ideas on the Channel 2 Fresh Living Show tomorrow morning}.
This second party activity is similar to the ziplock bag activity {here}. It's just one more way for the kiddos to make ice cream! Either one is super fun and easy.
KICK/ROLL THE CAN ICE CREAM
You will need:
- 1 pint half & half
- 1/3 cup granulated sugar
- 4 tablespoons of your favorite pudding mix
- 10 cups ice
- 1 1/2 cups rock salt {kosher salt or sea salt may be used too}
- 3-pound can, emptied and rinsed
- 1-pound can, emptied and rinsed
- Duct tape
Photography by Lyndsey Fagerlund

How to make:
1. In a medium bowl, combine half and half, sugar and pudding mix with a whisk until mixed.
2. Place the 1-pound can inside the 3 pound can and pour ice cream mixture into the smaller can.
3. Cover the smaller can with it's lid and seal with duct tape.
4. Surround the smaller can with ice and salt by layering 5 cups of ice with 3/4 cup of salt, etc.
5. Cover the 3-pound can with it's lid and seal with duct tape.

6. Have the kids kick the can around! They can also roll the can back and forth on its side. Do this for 10 minutes.

7. After 10 minutes, open up the cans and check the ice cream. The mixture on the sides of the smaller can will set up faster than the center so use a rubber spatula to quickly scrape down the sides and give the ice cream one big stir. Replace the lid on the smaller can and reseal with duct tape.
8. Dump out the melted ice and place the smaller can back into the larger one. Surround the small can with new ice and salt and put the lid back on and seal with duct tape.
9. Ask the kids to roll or kick the can for 10 more minutes.
10. Once they're done, open the cans and serve the ice cream to your little guests!
*Use your favorite flavor of pudding to change the ice cream flavor.
*After the first 10 minutes of kicking the can, mix in some nuts, chocolate chips, or cookie crumbles to enhance the flavor of your ice cream.
*Use your favorite flavor of pudding to change the ice cream flavor.
*After the first 10 minutes of kicking the can, mix in some nuts, chocolate chips, or cookie crumbles to enhance the flavor of your ice cream.


8 comments:
This looks so fun. I am wondering if you have ideas for where to get cans with lids - particularly the small size.
What a crazy cute idea!! Love it!
Oh my goodness....that ice cream is the cutest thing! Do you have more photos of the ice cream decor? I am throwing my sister a pickles and ice cream baby shower party soon and if you had time and wouldn't mind- Could you tell me where you go the huge pink ice cream decorations on both sides....I am in love with these!I would greatly appreciate it! You can leave a comment on my blog or send me an email at daisypinkshop@yahoo.com
Mike & Shayla- A large coffee can is the perfect size {or food storage cans} for the big one. And the small...I used a hot chocolate can {but I believe that coffee comes in this size as well}. :]
love this :) can't wait to see the rest.. i'll be blog stalking over the next two weeks!!* BUT I have to ask .. please with a cherry tell me where you got that ice cream truck?!?! It makes the party!!
Thank you, everyone :]. Talia- I bought the ice cream truck! It was old and needed some work...new paint makes anything look 100 times better! :]
Superb and best idea your shared with us. It is very much useful for my kitty parties also. Well, Kara, I like to appreciate you for sharing superb information with us. Keep sharing.
I did this with my kids a few months ago, and when the can got too cold on the outside for us, I got the push brooms and we played a little broom hockey!
Post a Comment